Have you ever dreamed of that tangy, chewy, crusty sourdough bread, but thought it was off-limits because of a gluten intolerance? Well, good news! You absolutely can enjoy delicious sourdough, even if you’re gluten-free. This guide will walk you through everything you need to know about making amazing gluten free sourdough bread at home. It might seem intimidating at first, but trust me, it’s easier than you think – and so rewarding!
Understanding Gluten Free Sourdough Bread
Let’s start with the basics. What makes sourdough, well, sourdough? And how does the gluten-free version stack up?
What is Sourdough and Why is it Different?
Sourdough is unique because it doesn’t rely on commercial yeast to rise. Instead, it uses a “starter,” which is a lively colony of wild yeasts and good bacteria. These little guys ferment the flour, creating that signature sour flavor and airy texture. Think of it as a natural, bubbly magic show happening right in your kitchen! This fermentation process is what gives sourdough its characteristic tang and complex flavor profile.
The Benefits of Gluten Free Sourdough
Besides the incredible taste, gluten free sourdough bread offers some potential benefits. The fermentation process can make the bread easier to digest, even for some people who are sensitive to gluten (though not suitable for those with celiac disease – more on that below!). The long fermentation can also break down some of the starches, potentially leading to a lower glycemic index compared to some other breads. Plus, you get to control the ingredients, avoiding any unwanted additives.
Is All Sourdough Gluten Free?
This is a crucial point: traditional sourdough bread is made with wheat flour, which contains gluten. So, no, regular sourdough is not gluten-free. To enjoy sourdough if you’re avoiding gluten, you need to specifically make or buy gluten free sourdough bread, which uses gluten-free flours and a gluten-free starter.
Key Differences: Gluten Free vs. Traditional Sourdough
The main difference, of course, is the flour. Traditional sourdough uses wheat, rye, or other gluten-containing flours. Gluten free sourdough bread, on the other hand, relies on a blend of gluten-free flours like rice flour, tapioca starch, sorghum flour, and others. This also means the starter needs to be made with gluten-free flour. The texture can be slightly different, but with the right techniques, you can achieve a wonderfully chewy and crusty loaf.
Essential Ingredients for Gluten Free Sourdough Bread
Now, let’s gather our ingredients. Don’t worry; you won’t need anything too exotic.
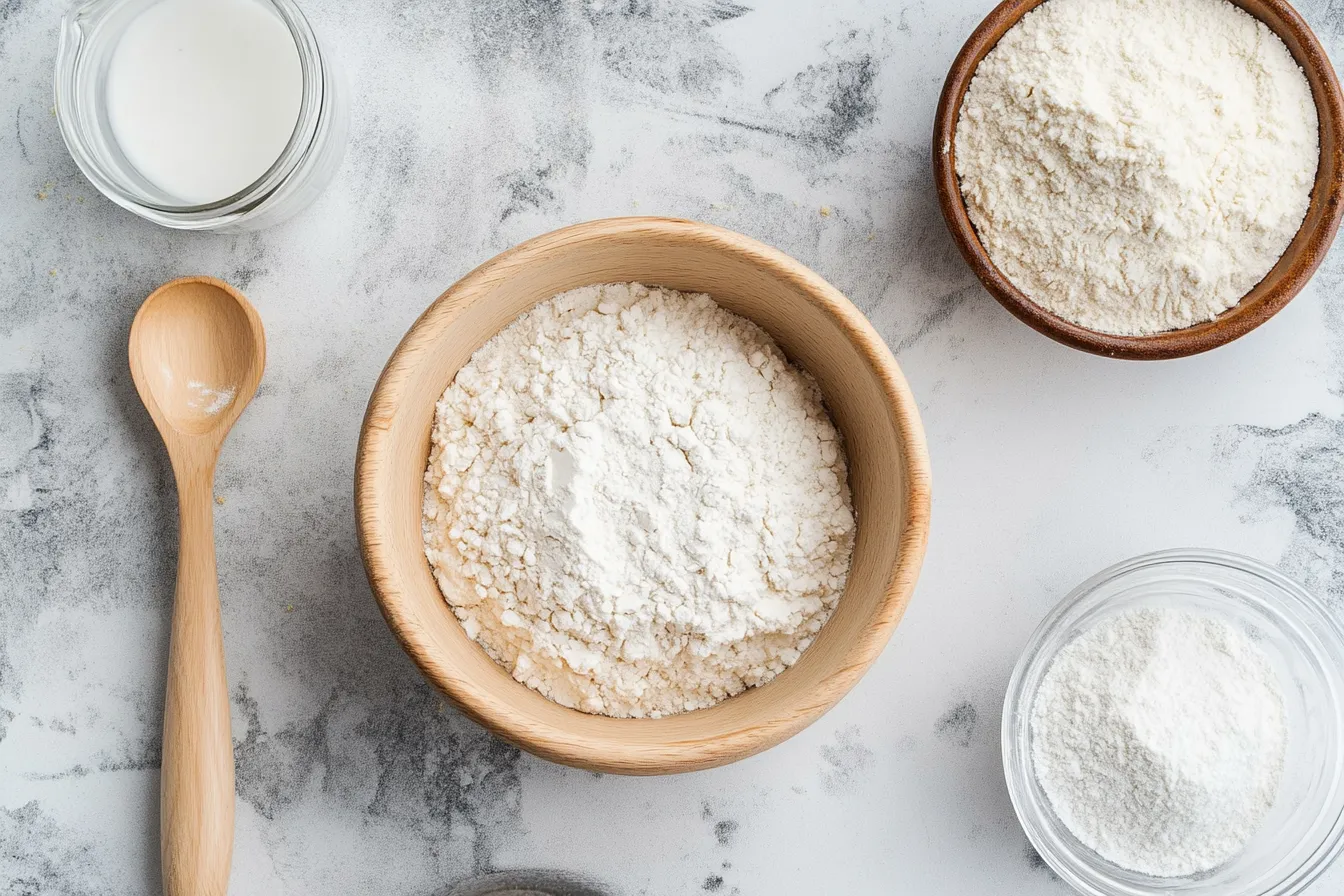
Choosing the Right Gluten Free Flours
This is where the magic happens! A good blend is key for the best texture and flavor. You’ll likely use a combination of:
- Rice Flour (White or Brown): A common base for gluten-free baking.
- Tapioca Starch/Flour: Adds chewiness.
- Sorghum Flour: Provides a slightly sweet, nutty flavor.
- Potato Starch: Helps with moisture and structure.
- Millet Flour: Adds the taste.
You can experiment with different blends to find your favorite! Pre-made gluten-free bread flour blends can also work, but be sure to check the ingredients to ensure they’re suitable for sourdough.
The Role of a Gluten Free Sourdough Starter
The starter is the heart and soul of sourdough. It’s what gives the bread its rise and unique flavor. A gluten free sourdough starter is simply a starter made with gluten-free flour and water, cultivated over time to develop those beneficial yeasts and bacteria.
Understanding Psyllium Husk
Because gluten-free flours lack the protein (gluten) that gives traditional bread its structure, we need a little help. Psyllium husk is a popular choice. It acts as a binder, absorbing water and creating a gel-like consistency that mimics gluten’s elasticity. Xanthan gum and chia seeds can also be used, but psyllium husk tends to give the best results for sourdough.
Water Quality and Temperature: Impact on Sourdough
Believe it or not, even water matters! Use filtered or dechlorinated water, as chlorine can harm the microorganisms in your starter. Temperature is also crucial. Warm water (around 80-85°F) encourages activity, while cold water slows it down. This is important for controlling the fermentation process.
Salt: Importance and Types for Gluten Free Baking
Salt does more than just add flavor. It controls the yeast activity, strengthens the dough (even in gluten-free baking!), and enhances the overall taste. Fine sea salt is a great option.
Creating Your Gluten Free Sourdough Starter
Making your own starter is a fun and rewarding project. It’s like having a little science experiment in your kitchen!
Step-by-Step Guide to Making a Starter from Scratch
- Day 1: Combine equal parts (e.g., 50g) gluten-free flour (rice flour is a good starting point) and lukewarm, filtered water in a clean jar. Mix well. Cover loosely with a lid or cloth.
- Days 2-7 (or longer): “Feed” your starter daily. Discard about half of the mixture, then add equal parts fresh flour and water. Stir well.
- Observe: Look for bubbles and a slightly sour smell. This means your starter is becoming active! The time it takes to become fully active can vary depending on your environment.
Choosing Your Starter Flour
Brown rice flour is often recommended for its neutral flavor and good results. Sorghum flour can also be used, adding a slightly sweet note. Experiment to see what you prefer!
Feeding Your Starter: Schedule and Ratios
Typically, you’ll feed your starter equal parts (by weight) of starter, flour, and water. For example, if you have 50g of starter, you’d add 50g of flour and 50g of water. A consistent feeding schedule (once or twice a day) is important for a healthy starter.
Recognizing an Active and Healthy Starter
A healthy, active starter will:
- Double in size within a few hours after feeding.
- Have lots of bubbles throughout.
- Have a pleasant, slightly sour smell (not overly pungent or unpleasant).
- Pass the “float test”: A small spoonful of starter should float in a glass of water.
Troubleshooting Common Starter Problems
- No activity: Make sure your water isn’t too hot or too cold. Be patient; sometimes it takes a little longer.
- Liquid on top (hooch): This is normal; it just means your starter is hungry. Stir it back in and feed.
- Mold: If you see mold (fuzzy, colored spots), discard the starter and start over.
Equipment You’ll Need for Baking Gluten Free Sourdough Bread
Having the right tools makes the process much smoother.
Mixing Bowls, and Spatulas
You’ll need a few different-sized bowls for mixing the dough and feeding the starter. Silicone or plastic spatulas are great for scraping down the sides.
Digital Kitchen Scale
This is essential! Baking, especially gluten-free baking, is a science. Measuring ingredients by weight is much more accurate than using cups, leading to more consistent results.
Banneton Basket (Proofing Basket) or Alternatives
A banneton basket helps shape the loaf and creates those beautiful, rustic rings on the crust. If you don’t have one, you can use a bowl lined with a floured cloth.
Dutch Oven (or Baking Stone/Steel) – Pros and Cons
A Dutch oven creates a steamy environment, which is crucial for a good crust. Baking stones or steels can also work, but you’ll need to create steam in your oven using other methods (e.g., a pan of water).
Parchment Paper and Other Helpful Tools
Parchment paper makes it easy to transfer the dough to the hot Dutch oven. Other helpful tools include a dough scraper, a spray bottle for water, and a thermometer to check water temperature.
Bread Lame or Sharp Knife
Scoring the dough before baking allows it to expand properly and creates beautiful, artistic designs. A bread lame is a specialized tool for this, but a very sharp knife can also work.
Step-by-Step Guide: Making Gluten Free Sourdough Bread
Now for the main event! Let’s bake some bread.
Preparing the Levain (Activating the Starter)
The “levain” is simply a portion of your active starter that you’ll use to leaven the bread. A few hours before you want to mix the dough, take a small amount of your starter and feed it. This “refreshed” starter is your levain.
Mixing the Dough: Autolyse and Bulk Fermentation
- Autolyse: Combine the flour(s) and water in a bowl. Mix until just combined. Let it rest for 30-60 minutes. This allows the flour to fully hydrate, resulting in a better texture.
- Add Levain and Salt: After the autolyse, add the levain and salt. Mix thoroughly until everything is well incorporated.
- Bulk Fermentation: This is the first rise. Let the dough rest, covered, in a warm place for several hours (the exact time will depend on your starter and room temperature). During this time, perform a series of “stretch and folds” every 30-60 minutes. This helps develop strength in the dough.
Shaping the Dough: Techniques for Gluten Free Bread
Gently turn the dough out onto a lightly floured surface. Shape it into a round or oval loaf. Be careful not to deflate the dough too much.
Proofing the Dough: Cold Proofing vs. Room Temperature
Place the shaped dough in a banneton basket (or a bowl lined with a floured cloth). You can either proof it at room temperature for a few hours or in the refrigerator overnight (cold proofing). Cold-proofing develops a more complex flavor.
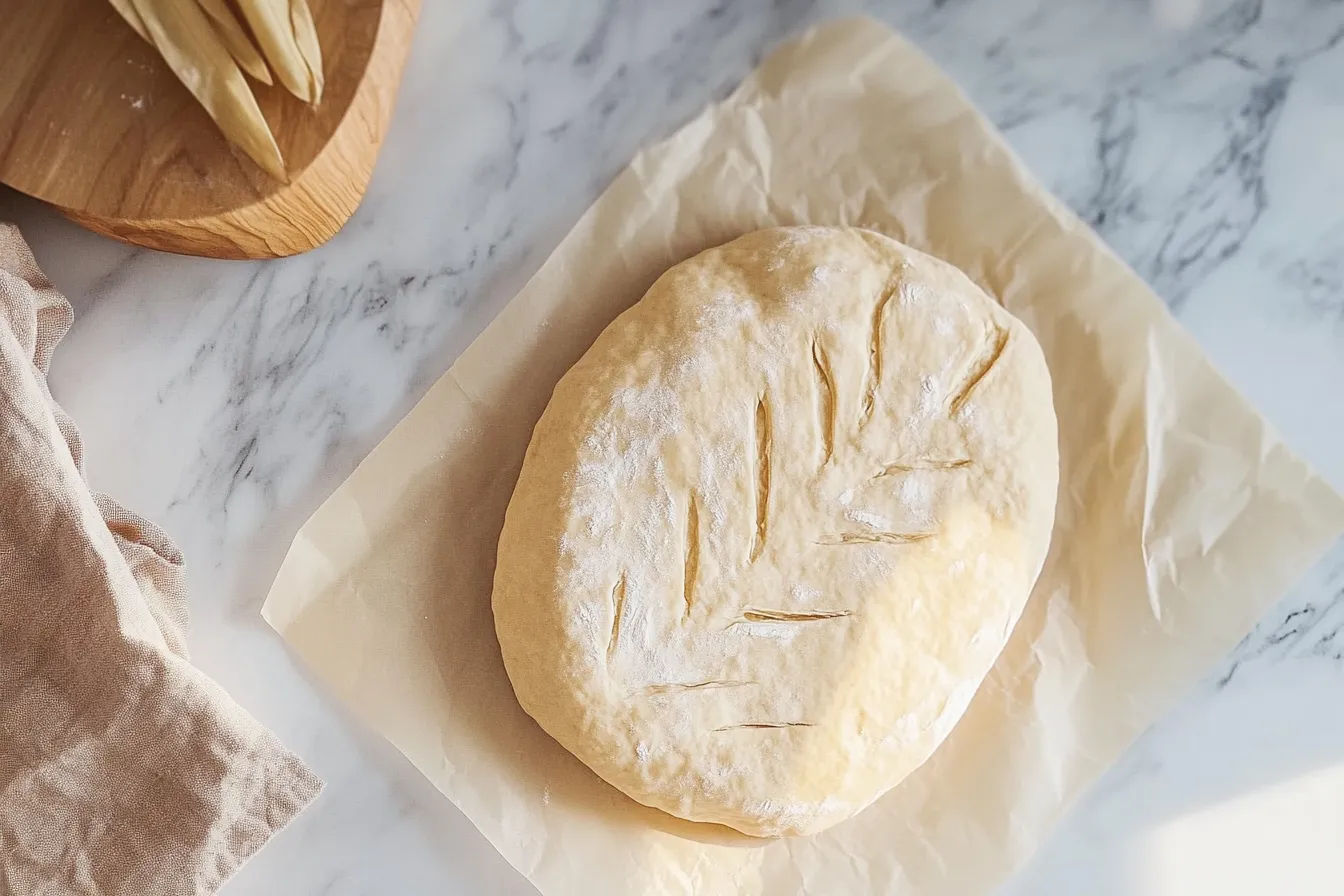
Scoring the Dough: Purpose and Patterns
Just before baking, use a bread lame or a sharp knife to score the top of the loaf. This controls how the bread expands and creates a beautiful design.
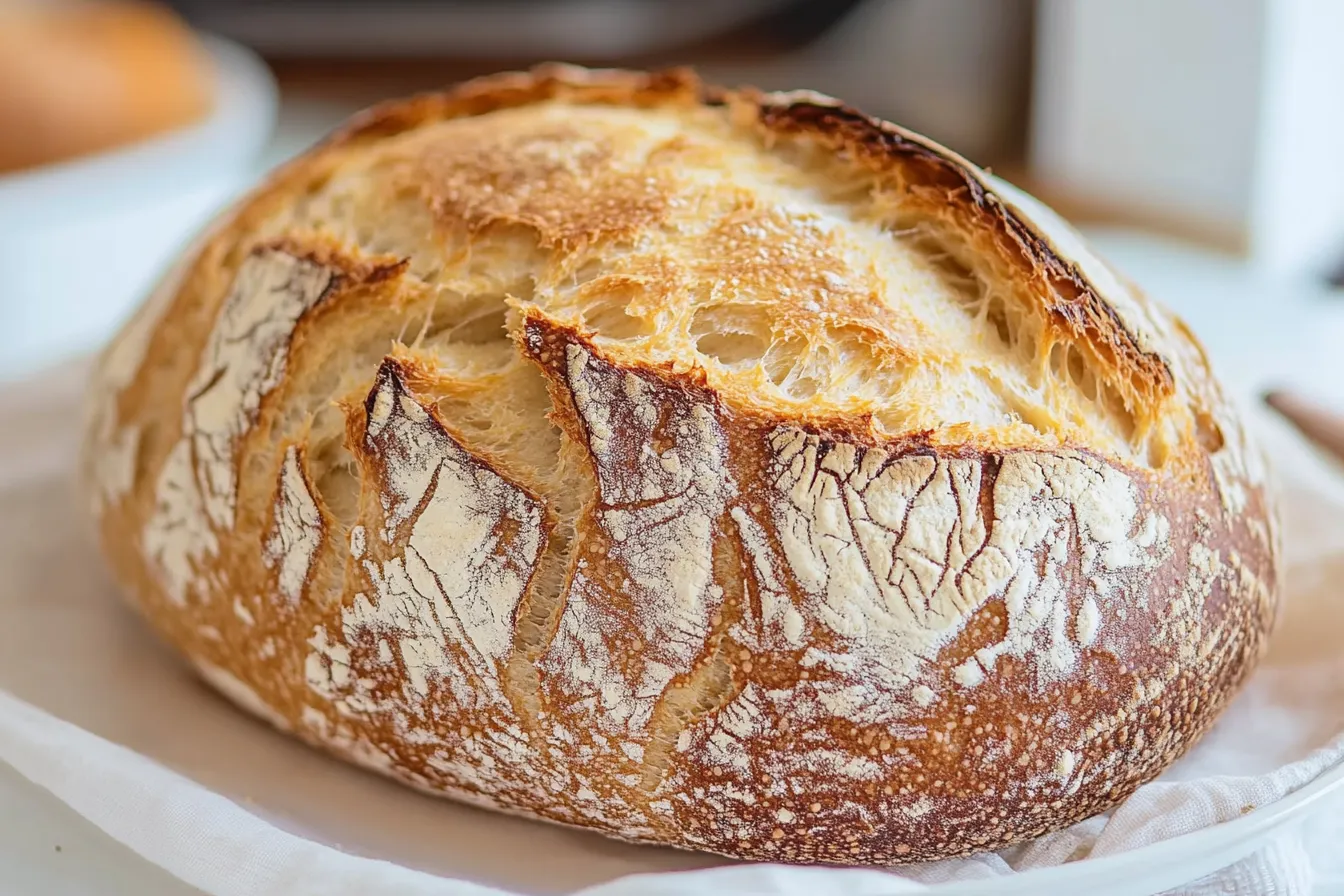
Baking the Bread: Dutch Oven Method and Alternatives
- Preheat: Preheat your Dutch oven (with the lid on) to 450-500°F (232-260°C) for at least 30 minutes.
- Bake Covered: Carefully remove the hot Dutch oven. Place the dough (on parchment paper, if using) inside. Cover with the lid and bake for 20-30 minutes.
- Bake Uncovered: Remove the lid and bake for another 20-30 minutes, or until the crust is deeply golden brown and the internal temperature reaches 200-210°F (93-99°C).
Cooling and Slicing Your Gluten Free Sourdough Bread
Let the bread cool completely on a wire rack before slicing. This is crucial for the best texture!
Troubleshooting Your Gluten Free Sourdough Bread
Even experienced bakers encounter problems sometimes. Here’s how to fix common issues:
Why is My Bread Dense or Gummy?
- Under-proofed: The dough didn’t rise enough.
- Too much liquid: The dough was too wet.
- Starter not active enough: Your starter might need more time or more frequent feedings.
- Over-proofed: Your dough was proofed for too long.
My Bread Didn’t Rise: Common Causes and Solutions
- Inactive starter: See above.
- Cold environment: The dough needs warmth to rise.
- Too much salt: Salt inhibits yeast activity.
Troubleshooting Crumb Structure
- Uneven mixing: Make sure the ingredients are well combined.
- Over-proofing: Can lead to large, irregular holes.
- Under-proofing: May create smaller holes and uneven texture.
Improving the Crust: Color, Thickness, and Crispness
- Steam: A Dutch oven creates the steam needed for a good crust.
- Baking temperature: Make sure your oven is hot enough.
- Baking time: Don’t underbake!
Addressing Sourness: Too Sour or Not Sour Enough
- Fermentation time: Longer fermentation = more sourness.
- Starter feeding: A frequently fed starter tends to be less sour.
- Temperature: Warmer temperatures lead to faster fermentation and more sourness.
Gluten Free Sourdough Bread Recipe Variations
Once you’ve mastered the basic recipe, get creative!
Adding Seeds, Nuts, or Dried Fruits
Mix these in during the shaping stage.
Incorporating Herbs and Spices
Add dried or fresh herbs (rosemary, thyme, etc.) or spices (cinnamon, cardamom) to the dough.
Making Gluten Free Sourdough Focaccia or Pizza Dough
With slight adjustments to the hydration and baking method, you can use your sourdough starter to make other delicious breads.
Sweet Gluten Free Sourdough Bread Options
Add a touch of honey or maple syrup to the dough for a slightly sweet loaf.
Storing and Enjoying Your Gluten Free Sourdough Bread
Proper storage keeps your bread fresh longer.
Best Practices for Short-Term Storage
Store at room temperature in a breadbox or paper bag for up to 3-4 days.
Freezing Gluten Free Sourdough Bread (Whole Loaves and Slices)
Wrap tightly in plastic wrap and then foil. Freeze for up to 2-3 months. Thaw at room temperature or in the refrigerator.
Reheating and Refreshing Your Bread
Reheat slices in a toaster or oven. For a whole loaf, sprinkle with water and bake at 350°F (177°C) for 10-15 minutes to refresh the crust.
Serving Suggestions and Recipe Ideas
Enjoy your gluten free sourdough bread with butter, jam, cheese, avocado toast, or as a side to soups and stews. It also makes fantastic sandwiches!
Frequently Asked Questions about Gluten Free Sourdough Bread
Let’s get some common questions answered.
Can I Use a Regular Sourdough Starter?
No, a regular sourdough starter contains gluten. You need a starter made with gluten-free flour.
How Long Does Gluten Free Sourdough Last?
It’s best within the first few days, but it can last up to a week stored properly at room temperature, or longer if frozen.
Can I Speed Up the Fermentation Process?
You can slightly increase the temperature, but don’t rush it too much. Slow fermentation develops the best flavor.
What is the Best Temperature for Baking?
Generally, 450-500°F (232-260°C) is a good range for sourdough.
Can I make Gluten free Sourdough without Psyllium Husk?
Yes, you can use xanthan gum or chia seeds as alternative binders, but psyllium husk often gives the best results.
Enjoy your homemade gluten free sourdough bread! It’s a journey, but so worth it. Don’t be afraid to experiment and have fun. Now that you are armed with this knowledge, go forth and bake! Share your creations and let us know how it goes!