Ever grab a bottle of chicken seasoning off the shelf and think, “Hmm, I wish this had a little more kick,” or maybe, “Yikes, that’s salty!”? You’re not alone! While store-bought blends are convenient, whipping up your own chicken seasoning at home is completely revolutionary. Seriously, once you try it, you might never go back.
Why Make Your Own Chicken Seasoning Blend?
Think about it: making your mix puts you in the driver’s seat. It’s not just about following a recipe; it’s about creating the perfect flavor profile that makes your taste buds sing every single time you cook chicken. Let’s break down why ditching the store-bought stuff for a homemade chicken seasoning is such a brilliant move.
Control Over Flavor and Sodium
This is probably the biggest win. Store-bought seasonings often pack a serious sodium punch and sometimes include flavors you might not even like. When you mix your own, you decide exactly how much salt goes in – or if you want any salt at all! Want more garlic? Go for it. Crave a smokier flavor? Add extra smoked paprika. Fancy a bit more heat? You get the picture. Your homemade chicken seasoning is your perfect blend, tailored precisely to your preferences. It’s like having a custom spice mix made just for you.
Cost-Effectiveness of DIY Seasoning
At first glance, buying individual spices might seem pricier than one pre-made jar. But think long-term! Those little jars of chicken seasoning add up. Buying spices, especially if you can find them in bulk or larger containers, is often much more economical. You’ll likely have leftover individual spices you can use in other recipes too. A little effort upfront saves you money down the road, and you get a far superior product.
Avoiding Fillers and Anti-Caking Agents
Speaking of fillers, ever read the ingredient list on a seasoning blend and see things like silicon dioxide or maltodextrin? These are often anti-caking agents or fillers designed to keep the seasoning from clumping and to add bulk. While generally considered safe, why add them if you don’t have to? Making your own chicken seasoning means you know exactly what’s in it: just pure, delicious spices and herbs. No unnecessary additives, just pure flavor power ready to make your chicken dishes amazing.
The Building Blocks of the Perfect Chicken Seasoning
Alright, so you’re ready to become a master blender of your own chicken seasoning. Awesome! But where do you start? Think of it like building with flavor blocks. Certain spices and herbs form the foundation, while others add personality and flair. Let’s explore the key components that make up a truly fantastic blend.
Foundation Spices: The Savory Base
These are the non-negotiables, the trusty workhorses of almost any savory seasoning blend.
- Salt: Enhances all other flavors and helps chicken retain moisture. Kosher salt or sea salt are great choices for blends.
- Black Pepper: Provides a gentle background heat and pungency. Freshly ground offers the best flavor, but pre-ground works too.
- Garlic Powder: Gives that savory, slightly sweet garlic kick without the hassle of fresh cloves.
- Onion Powder: Offers a subtle, rounded onion flavor that complements the garlic beautifully.
These four create the essential savory backdrop for your chicken seasoning.
Aromatic Herbs: Adding Freshness and Depth
Dried herbs bring herbaceous notes and complexity. Think about the kind of flavor you enjoy:
- Thyme: Earthy and slightly floral.
- Rosemary: Piney and robust (use a bit less, as it’s strong!).
- Oregano: Pungent and slightly peppery, essential for Mediterranean vibes.
- Dried Parsley: Adds color and a mild, fresh note.
- Marjoram/Sage: Can add unique, deeper notes often found in poultry seasonings.
Choose one or a combination to layer more flavor into your chicken seasoning.
Warmth and Complexity: Paprika, Cumin, and Friends
These spices add color, warmth, and a deeper complexity that really elevates your blend.
- Paprika: Provides a beautiful reddish color and a mild, sweet-peppery flavor. Hungarian sweet paprika is a classic choice.
- Cumin: Adds an earthy, warm, slightly smoky depth. Essential for many cuisines.
- Coriander Powder: Offers a slightly citrusy, earthy note that pairs well with cumin.
These spices bridge the gap between the savory base and any brighter or spicier elements.
Optional Heat: Cayenne, Chili Powder, or Red Pepper Flakes
If you like a little (or a lot of) kick in your chicken seasoning, this is where you add it.
- Cayenne Pepper: Brings clean, straightforward heat. Start small – it’s potent!
- Chili Powder: Often a blend itself, usually milder than cayenne and includes other spices like cumin and oregano. Adds warmth and color.
- Red Pepper Flakes: Offer little bursts of heat and visual appeal.
Adjust the amount based on your heat tolerance. Remember, you can always add more heat later, but you can’t take it away!
Secret Ingredients for an Ultimate Touch
Want to make your chicken seasoning truly special? Consider adding a “secret” ingredient that adds that little something extra.
- Smoked Paprika: Swaps regular paprika for this adds incredible smoky depth without actually smoking the chicken. A game-changer!
- Celery Seed: Provides a unique, slightly vegetal, savory note often found in classic poultry blends.
- Mustard Powder: Adds a subtle tang and complexity.
- Turmeric: For color and earthy notes (great in curry-inspired blends).
Experimenting here is key to developing your signature “ultimate” blend.
The Ultimate All-Purpose Chicken Seasoning Blend
Ready to mix up a batch? Here’s a fantastic starting point for an all-purpose chicken seasoning that works beautifully on almost any chicken dish. It’s balanced, flavorful, and easy to customize.
Essential Equipment for Your Seasoning Mix
You don’t need anything fancy! Just grab:
- A small to medium-sized bowl
- Measuring spoons
- A whisk or fork for mixing
- An airtight container for storage (a small glass jar works perfectly)
Ingredient List: Measurements for the Perfect Ratio
This recipe aims for a balanced, savory blend with warmth and a hint of herbs. Feel free to tweak it later!
- 3 Tablespoons Paprika (approx. 45 ml)
- 2 Tablespoons Garlic Powder (approx. 30 ml)
- 1 ½ Tablespoons Onion Powder (approx. 22.5 ml)
- 1 Tablespoon Dried Thyme (approx. 15 ml)
- 1 Tablespoon Kosher Salt (or sea salt) (approx. 15 ml) – Adjust to taste!
- 2 Teaspoons Black Pepper (freshly ground preferred) (approx. 10 ml)
- 1 Teaspoon Dried Oregano (approx. 5 ml)
- ½ Teaspoon Cayenne Pepper (Optional, for heat) (approx. 2.5 ml)
- (Optional Ultimate Touch): 1 Teaspoon Smoked Paprika (swap for 1 tsp regular paprika if desired) (approx. 5 ml)
Step-by-Step Instructions for Mixing Your Blend
It couldn’t be simpler:
- Gather: Measure out all your chosen spices and herbs.
- Combine: Add all ingredients to your bowl.
- Mix: Use a whisk or fork to thoroughly combine everything. Make sure there are no clumps and the color looks uniform. Breaking up any small clumps of garlic or onion powder is key.
- Store: Transfer your beautiful homemade chicken seasoning into an airtight container. Label it with the name and date.
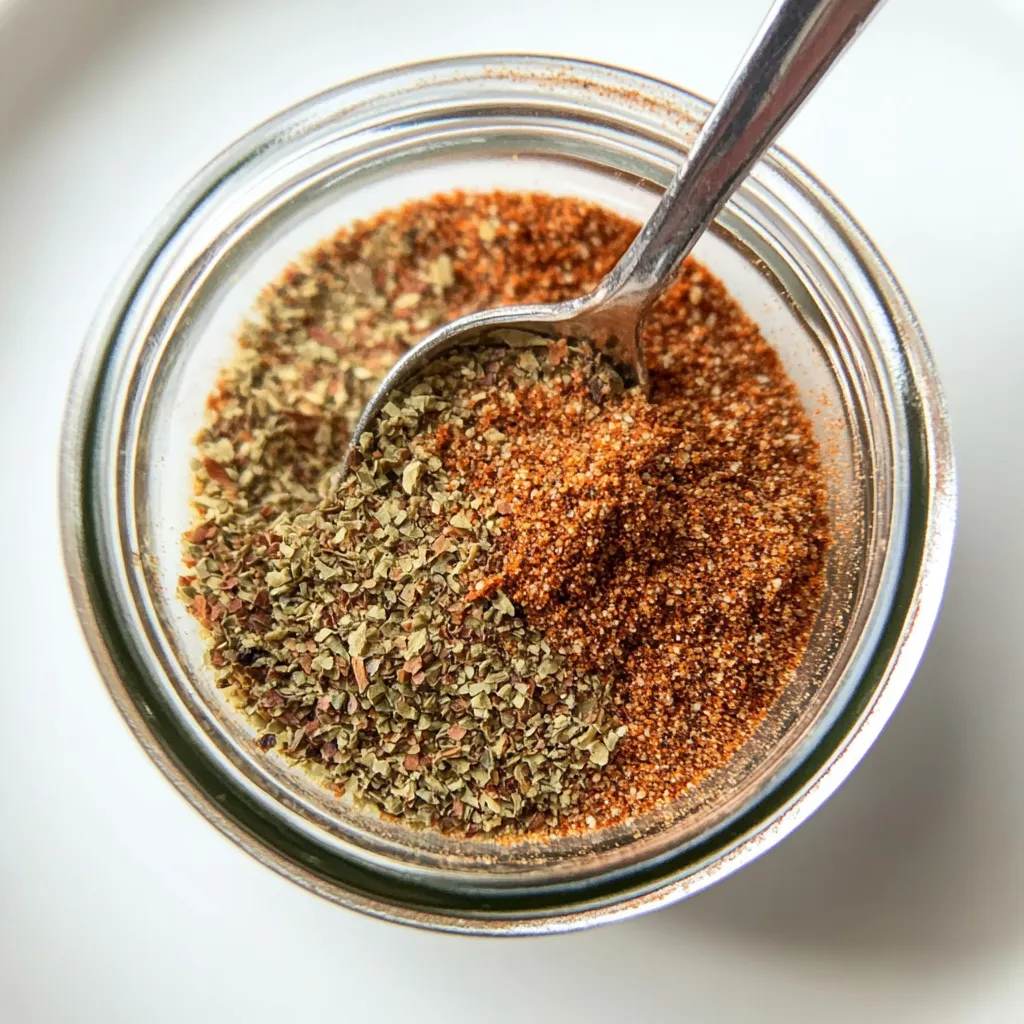
Visual Guide: What the Finished Seasoning Should Look Like
Your finished blend should have a lovely reddish-brown hue, thanks mainly to the paprika. You’ll see flecks of black pepper and dried herbs throughout. It should be relatively free-flowing, though some minor clumping can happen over time (we’ll cover that later!). Most importantly, give it a sniff – it should smell aromatic, savory, and inviting! That’s the smell of delicious chicken dinners to come.
Customizing Your Chicken Seasoning: Beyond the Ultimate Blend
The recipe above is fantastic, but the real fun begins when you start making it your own! Think of that recipe as your reliable base camp, and now you’re ready to explore the flavor mountains. Customizing your chicken seasoning is how you truly make it “ultimate” for your cooking style.
Adjusting Salt Levels to Your Preference
Salt is personal. The amount in the base recipe is a good starting point, but maybe you’re watching your sodium intake, or perhaps you just prefer things less salty.
- Reduce: Simply cut the amount of salt in half, or omit it entirely (see below for salt-free tips).
- Increase: If you like a saltier profile, add a bit more, maybe ½ teaspoon at a time, tasting cautiously if possible (though tasting raw spice blends isn’t recommended – judge by smell and past experience).
Remember, you can often add salt directly to the chicken along with your blend if you prefer precise control per dish.
Creating Regional Variations
Want to take your chicken on a trip around the world? Adapt your chicken seasoning!
- Italian Twist: Amp up the oregano and thyme, add dried basil and maybe a pinch of rubbed sage. Reduce or omit paprika if desired.
- Smoky BBQ Rub: Use smoked paprika generously. Consider adding brown sugar (just be mindful it can burn during high-heat cooking), mustard powder, and maybe a bit more chili powder or cayenne. Cumin also works well here.
- Mediterranean Flair: Add dried mint, dill, or increase the oregano and garlic. A pinch of lemon zest powder (if you can find it) is amazing.
- Cajun/Creole Kick: Increase the cayenne, paprika, garlic, and onion powder. Add white pepper and maybe some celery seed.
The possibilities are endless!
Herb-Forward vs. Spice-Forward Blends
Do you prefer the fresh, grassy notes of herbs or the warm, earthy depth of spices? You can tailor your chicken seasoning to lean either way.
- Herb-forward: Increase the amounts of thyme, oregano, parsley, rosemary, or other herbs you enjoy. Decrease some of the stronger spices like cumin if you want the herbs to shine.
- Spice-forward: Emphasize paprika, cumin, coriander, chili powder, or smoked paprika. Keep the herbs in the background for subtle complexity.
There’s no right or wrong way – just different delicious paths!
Making a Salt-Free Chicken Seasoning Option
Need a completely salt-free chicken seasoning? Easy peasy!
- Simply omit the salt from the recipe entirely.
- Consider boosting other flavors slightly to compensate. Add a little extra garlic powder, onion powder, herbs, or paprika.
- Ingredients like nutritional yeast (for a cheesy/savory note) or dried lemon zest powder can add complexity without salt.
- Remember to salt your chicken individually when cooking if the dish requires it.
This gives you complete control over the sodium in every meal.
How to Properly Season Chicken for Maximum Flavor
Okay, you’ve mixed your amazing, personalized chicken seasoning. Now, how do you get it onto the chicken for the best results? Applying seasoning correctly makes a huge difference. Don’t just sprinkle it on top haphazardly!
Dry Brining vs. Seasoning Right Before Cooking
This choice depends on time and desired outcome:
- Dry Brining: This means seasoning the chicken (especially with a salt-containing blend) several hours or even a day before cooking. The salt draws out moisture, dissolves, and then gets reabsorbed, seasoning the meat more deeply and helping it stay juicy. Pat the chicken dry before cooking. This is fantastic for whole birds or thicker cuts.
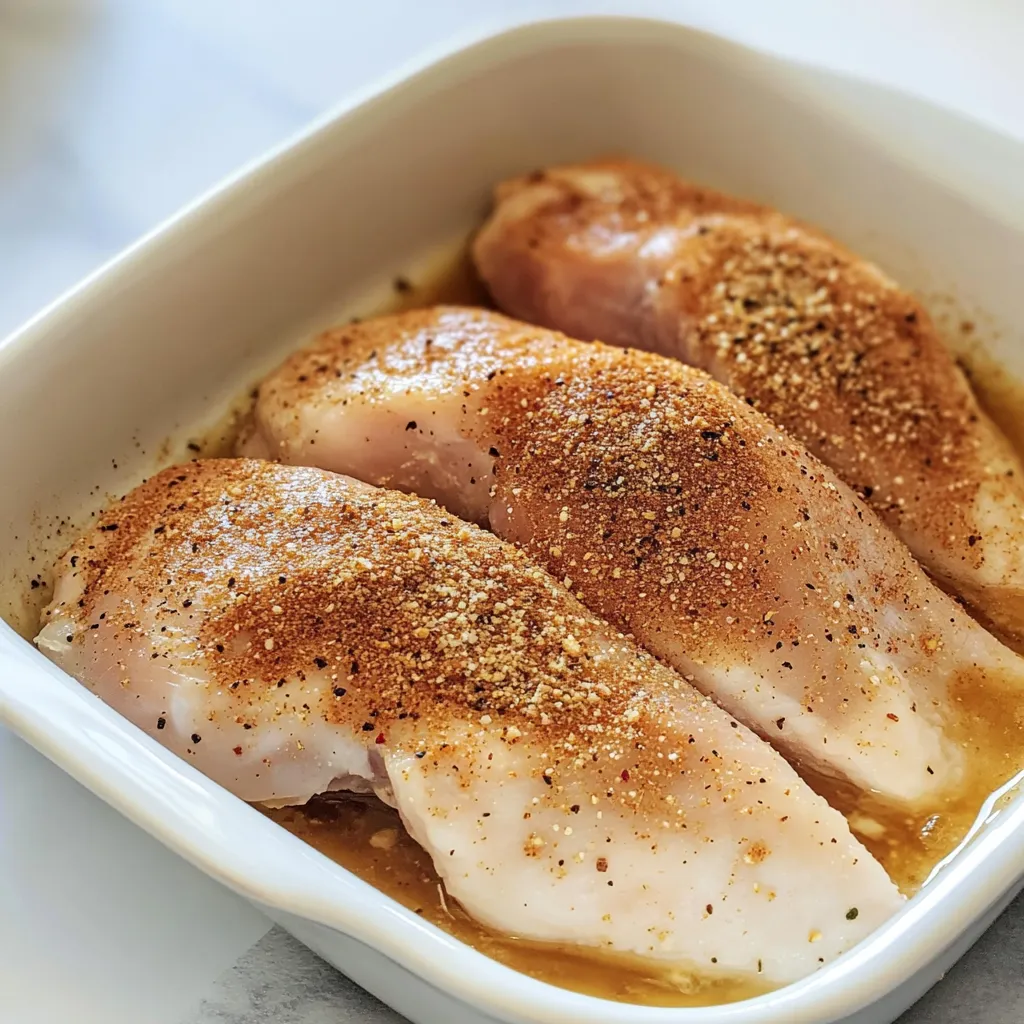
- Seasoning Right Before Cooking: Perfectly fine for thinner cuts (like breast cutlets) or when you’re short on time. Pat the chicken dry, lightly oil it (optional, helps seasoning stick), and apply your chicken seasoning generously right before it hits the heat.
For most everyday cooking, seasoning just before is common. For that extra wow factor on a roast chicken, try dry brining!
How Much Chicken Seasoning Per Pound of Chicken?
This is a common question, but the answer is “it depends”! A good general guideline is about 1 tablespoon of chicken seasoning per pound (approx. 450g) of chicken. However:
- Taste Preference: Use more if you like bold flavor, less if you prefer subtlety.
- Blend Intensity: If your blend is very salty or spicy, you might use less.
- Cooking Method: Roasting a whole chicken might require more seasoning than quickly pan-searing thin cutlets.
Start with the guideline and adjust it based on your results and preferences. Don’t be shy – chicken can handle a good amount of seasoning!
Applying Seasonings to Different Chicken Parts
Tailor your technique slightly for different cuts:
- Breasts/Cutlets: Aim for an even coating on all sides. Since they cook quickly, ensure good surface coverage.
- Thighs/Drumsticks: These often have more nooks and crannies. Make sure to get the seasoning all over, including any exposed bone ends.
- Whole Chicken: Season generously inside the cavity and all over the outside. Crucially, also try to get seasoning under the skin (see next point).
Tips for Getting Seasoning Under the Skin
This is key for flavoring the meat directly and achieving delicious skin!
- Gently loosen the skin from the chicken breast and thigh meat using your fingers or the back of a spoon. Be careful not to tear it completely off.
- Take pinches of your chicken seasoning and rub it directly onto the meat underneath the loosened skin.
- Smooth the skin back down.
- Season the outside of the skin as well.
This ensures flavor penetrates beyond just the surface.
Best Cooking Methods for Your Homemade Chicken Seasoning
Your versatile homemade chicken seasoning isn’t just for one type of cooking – it shines across various methods! Using the right technique can enhance the flavors you’ve carefully blended.
Perfect for Roasting and Baking
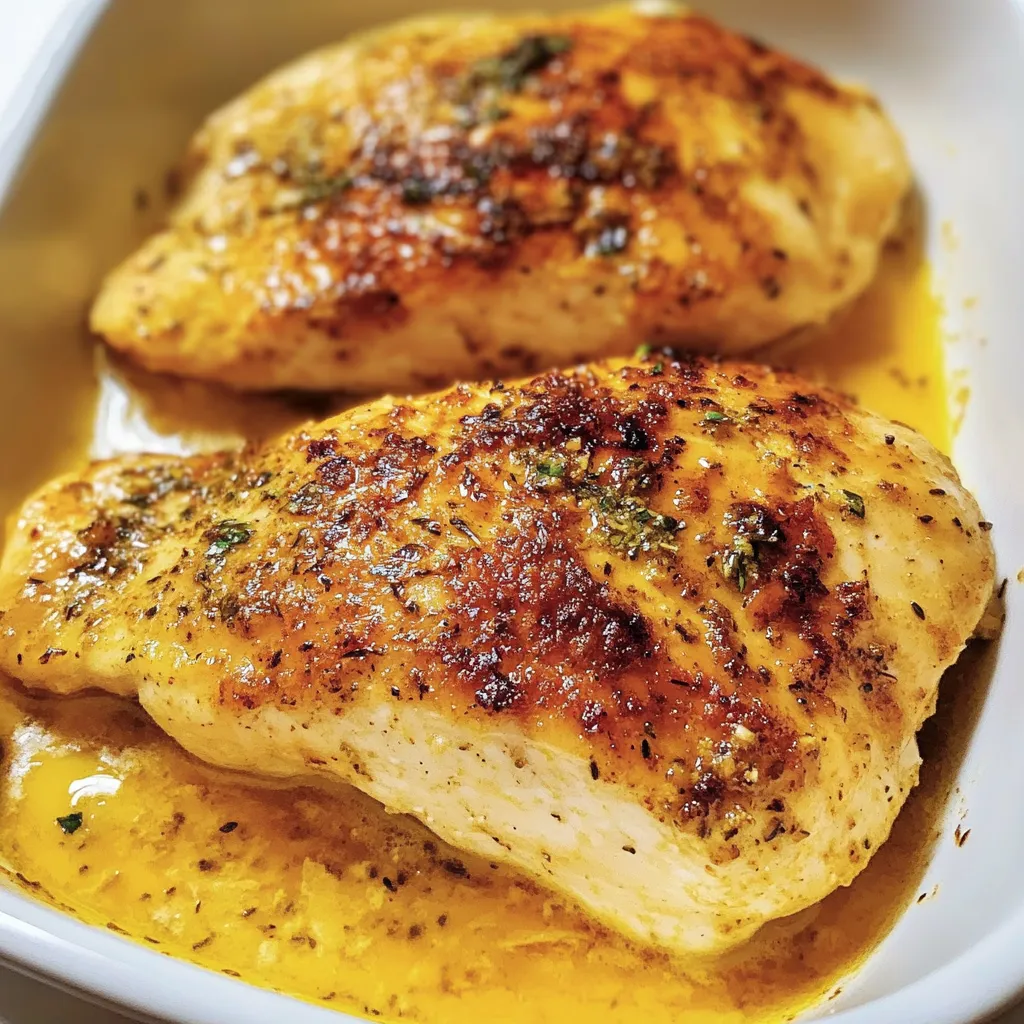
This is where your seasoning blend truly sings. The dry heat of the oven allows the spices to bloom and creates a delicious crust on the chicken. Whether it’s a whole roasted chicken, baked thighs, or simple sheet pan chicken and veggies, a generous sprinkle of your chicken seasoning before it goes into the oven guarantees fantastic flavor.
Achieving Crispy Skin with Your Seasoning Blend
Everyone loves crispy chicken skin! Your seasoning blend helps here too.
- Pat Dry: Always pat the chicken skin thoroughly dry with paper towels before seasoning. Moisture is the enemy of crispiness.
- Salt Helps: The salt in your blend draws out moisture, aiding crisping.
- Fat Aids Browning: Paprika and other spices contribute to browning, which often correlates with crispiness. Ensure your oven temperature is high enough (e.g., 400°F/200°C or higher).
- Don’t Crowd the Pan: Give the chicken pieces space for air to circulate.
Using your chicken seasoning combined with these techniques leads to irresistible skin.
Using Your Chicken Rub for Grilling and Smoking
Fire and smoke add another dimension to your seasoning. When used as a rub for grilling or smoking, the heat intensifies the spices.
- Grilling: Apply the seasoning generously. The direct heat creates a wonderful crust. Be mindful if your blend contains sugar, as it can burn over high direct heat – consider indirect heat for part of the cooking.
- Smoking: The smoky flavors meld beautifully with spices like paprika (especially smoked paprika!), cumin, garlic, and onion. This is where robust chicken seasoning blends really stand out.
Seasoning Chicken for Pan-Searing and Stir-Fries
Don’t forget stovetop methods!
- Pan-Searing: Season chicken pieces well before searing in a hot pan with a little oil. This creates a flavorful crust quickly. Great for breasts or thighs.
- Stir-Fries: While you might add sauces later, seasoning the chicken pieces with your blend before adding them to the wok or pan builds a foundational layer of flavor that permeates the whole dish. Use slightly less chicken seasoning, perhaps, as stir-fry sauces often add saltiness and flavor too.
Storing Your DIY Chicken Seasoning for Longevity
You’ve mixed up a big batch of your amazing chicken seasoning – hooray! Now, let’s make sure it stays fresh and flavorful for as long as possible. Proper storage is simple but crucial.
Choosing the Right Airtight Containers
Oxygen, light, and moisture are the enemies of fresh spices.
- Glass Jars: Small glass jars with tight-fitting lids (like spice jars, small mason jars, or even clean baby food jars) are ideal. Glass is non-reactive and seals well.
- Metal Tins: Dedicated spice tins can work, but ensure they have a tight seal and aren’t made of reactive metal.
- Avoid Plastic Bags: While okay for very short-term, zip-top bags aren’t truly airtight and don’t protect from light.
Whatever you choose, make sure it seals tightly.
Ideal Storage Conditions
Think like a vampire: Spices hate sunlight and heat!
- Cool: Avoid storing near the stove, oven, dishwasher, or sunny windowsills. Heat degrades the volatile oils that give spices their flavor.
- Dark: Light fades the color and potency of spices like paprika. A pantry or cupboard is perfect.
- Dry: Moisture causes clumping and can lead to spoilage. Keep containers tightly sealed and away from steamy areas. Never sprinkle directly from your storage jar over a steaming pot! Spoon out what you need.
How Long Does Homemade Chicken Seasoning Last?
While dried spices don’t technically “expire” in a way that makes them unsafe, they definitely lose their flavor potency over time.
- Peak Flavor: For the absolute best, most vibrant flavor, aim to use your homemade chicken seasoning within 6 months.
- Still Good: It will likely still be perfectly usable and tasty for up to a year, possibly longer, but the flavors will gradually become duller.
- Ground vs. Whole: Ground spices lose flavor faster than whole spices.
Always label your jar with the date you made the blend!
Signs Your Seasoning Blend Has Lost Potency
How can you tell if your chicken seasoning is past its prime? Use your senses:
- Color: Has the vibrant color faded significantly? Paprika turning brownish instead of reddish is a sign.
- Aroma: Crush a small amount between your fingers. Does it still have a strong, distinct smell? If the aroma is weak or dusty, it’s losing potency.
- Flavor: If it looks and smells dull, the flavor will be too. It won’t ruin your dish, but it won’t deliver that flavor punch you expect. Time to mix a fresh batch!
Making your own chicken seasoning is incredibly rewarding. You get better flavor, control over ingredients, save money, and can create a blend that’s perfectly you. So grab those spices, start mixing, and get ready to elevate your chicken dishes from good to absolutely unforgettable!