Table of Contents
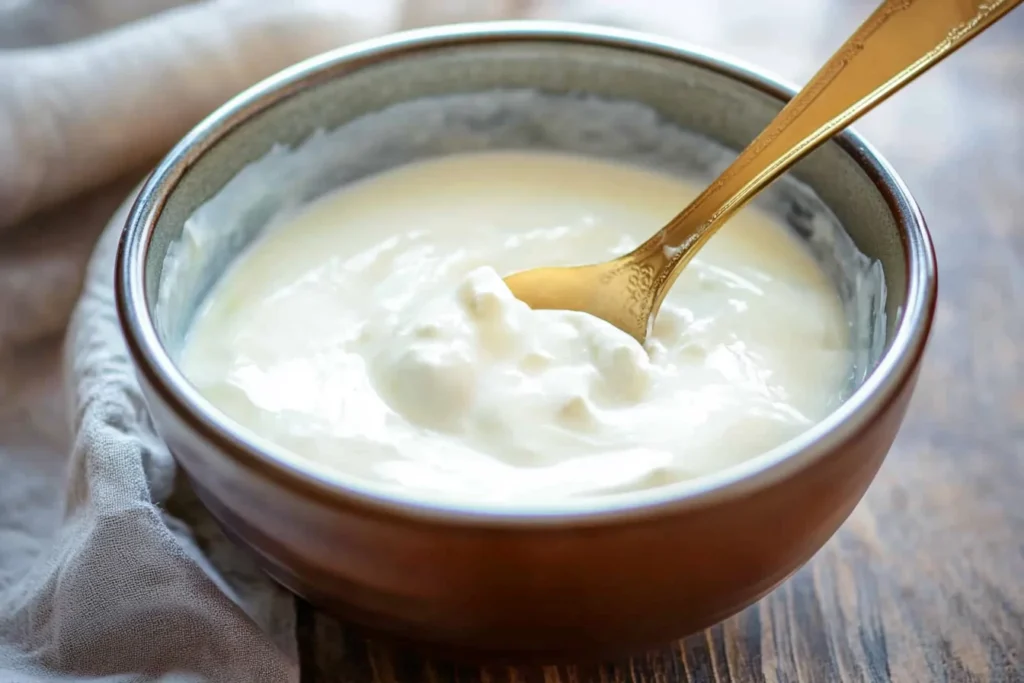
Learning how to make Instant Pot yogurt has been a game-changer for my kitchen routine. If you’ve ever wondered if you could make creamy, delicious yogurt at home without any fancy equipment, this simple two-ingredient method will revolutionize your morning routine and save you countless dollars at the grocery store.
Making yogurt in your Instant Pot requires just two simple ingredients and transforms them into something magical through a process that’s mostly hands-off. The best part? You’ll know exactly what goes into your yogurt, making it a healthier alternative to store-bought versions that often contain unnecessary additives and preservatives. USDA nutrition facts for homemade yogurt.
Best Instant Pot Yogurt Settings and Features
What makes the Instant Pot particularly special for yogurt-making is its dedicated “yogurt” function. This isn’t just another button on your multi-cooker – it’s a carefully engineered feature that maintains the precise temperature needed for yogurt cultures to thrive. The pot keeps your milk at a consistent temperature between 110°F and 115°F, creating the perfect environment for those beneficial bacteria to work their magic.
This level of temperature control is what sets the Instant Pot apart from regular pressure cookers and makes it your secret weapon for consistent, perfect yogurt every time.
Instant Pot Yogurt Ingredients and Equipment
Required Instant Pot Yogurt Ingredients
- Milk (your choice of skim, 1%, 2%, or whole milk)
- Plain yogurt with active cultures (look for Lactobacillus bulgaricus or Streptococcus thermophilus on the label)
Pro tip: While any milk works, higher fat content yields creamier, thicker yogurt. If you’re using skim milk, don’t worry – I’ll share some special tips to ensure your yogurt turns out great!
Required Equipment
- Instant Pot (any model with the yogurt function)
- Instant-read digital thermometer
- Whisk
- Large spoon or ladle
Optional Equipment
- Cheesecloth
- Fine-mesh strainer (if you want to make Greek yogurt)
- Storage containers
Preparing Your Workspace
Before we dive into the yogurt-making process, proper preparation is crucial. Think of this step as laying the foundation for success. Start by thoroughly cleaning your Instant Pot with warm, soapy water. For an extra level of certainty, you can sterilize it by adding 2 cups of water and pressure cooking on high for 3 minutes with a natural release. FDA guidelines for dairy food safety
This might seem like an unnecessary step, but trust me – taking these few extra minutes can make the difference between perfect yogurt and a failed batch.
Homemade Yogurt Recipe Instant Pot: Step-by-Step
1. Heating the Milk
- Pour your milk into the clean Instant Pot insert
- Close the lid (don’t worry about the vent position)
- Press the “yogurt” button, then “adjust” until you see “BOIL” on the display
- Once it beeps, check the temperature with your thermometer – you’re aiming for 180-200°F
2. Cooling Phase
Now comes the waiting game. Your milk needs to cool to the perfect temperature (110-115°F) before adding the starter culture. You have two options:
- Patient Method: Let it cool at room temperature (1-2 hours)
- Express Method: Create an ice bath and cool for 10-15 minutes
Don’t forget to remove any skin that forms on top of the milk – this ensures a smoother final product.
3. Adding Your Starter
This step requires a gentle touch:
- Take a ladleful of the warm milk and mix it with your yogurt starter in a separate bowl
- Gently whisk this mixture back into the main pot
- Stir thoroughly but carefully
4. Instant Pot Yogurt Incubation Settings
Now for the magic:
- Return the pot to your Instant Pot base
- Secure the lid
- Press the “yogurt” button and set your time (8-12 hours)
Time Guide:
- 8 hours: Milder, looser yogurt
- 10 hours: Medium tanginess and thickness
- 12 hours: Thicker, tangier yogurt
5. The Final Steps
When the timer beeps, your yogurt should have a slight jiggle, similar to jello. Transfer it to the refrigerator for at least 4 hours or overnight. This final chilling step is crucial for achieving the perfect texture.
How to Make Instant Pot Greek Yogurt
Instant Pot Greek Yogurt Instructions
Want thick, protein-rich Greek yogurt? Here’s how:
- Line a fine-mesh strainer with cheesecloth
- Place it over a bowl
- Pour in your finished yogurt
- Strain for 2-6 hours, depending on your desired thickness
Don’t throw away the whey that drains off – it’s packed with proteins and great for smoothies!
Working with Skim Milk
If you’re using skim milk, add an extra tablespoon of yogurt starter for every quart of milk. This helps achieve a better texture despite the lower fat content.
Troubleshooting Instant Pot Yogurt Problems
Problem: Runny Yogurt
Common causes include:
- Too much starter culture
- Insufficient incubation time
- Adding starter when milk was too hot
Solution: Check your yogurt every hour during incubation. If it’s not thickening, let it incubate longer.
Storage and Serving
Your homemade yogurt will be kept in the refrigerator for up to 10 days. Remember that homemade yogurt typically has a different texture than store-bought – it might be a bit thinner and occasionally lumpier. Give it a good whisk before serving to smooth out any inconsistencies.
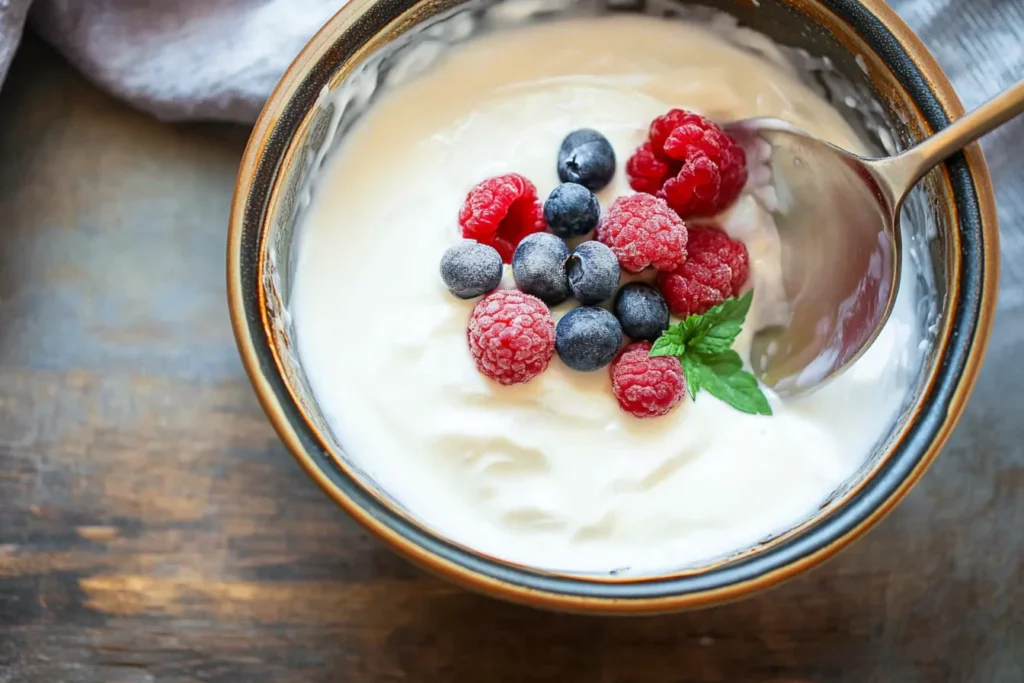
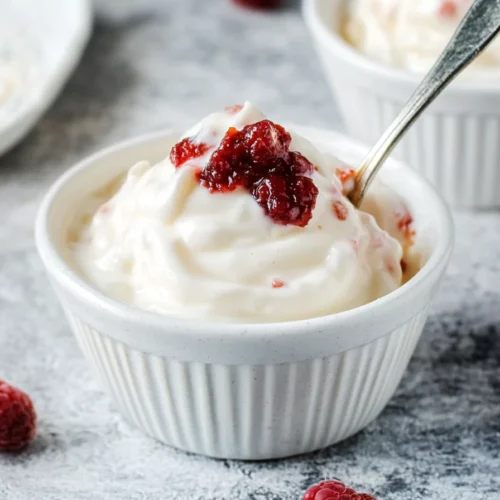
Delicious Ways to Serve Your Yogurt
Wait until after chilling to add any of these delicious mix-ins:
- Vanilla extract and honey
- Fresh berries and maple syrup
- Homemade jam
- Crunchy granola
- Fresh fruit compote
Beyond Basic Yogurt
Your homemade yogurt isn’t just for breakfast! Use it in:
- Smoothies
- Baked goods
- As a sour cream substitute
- Frozen yogurt treats
- Overnight oats
Freezing Tips
Yes, you can freeze your homemade yogurt! It will keep for up to one month in the freezer. While the texture might change slightly upon thawing, it’s still perfect for smoothies or baking. You can even use thawed yogurt as a starter for your next batch. Proper storage guidelines for homemade yogurt.
Customizing Instant Pot Yogurt Flavors
Enhancing the flavor profile of your homemade yogurt is a fun way to tailor it to your taste preferences. This section can offer detailed guidance on both pre-fermentation and post-fermentation customizations.
Pre-Fermentation Flavor Infusions
- Choosing Your Add-ins:
Consider natural flavorings such as vanilla bean, cinnamon sticks, cardamom pods, or even a few fresh herbs (like mint) that can gently infuse the milk before fermentation.- Tips:
- Use whole spices to avoid gritty textures.
- Lightly crush spices (e.g., cinnamon sticks or cardamom pods) to enhance the infusion without overpowering the yogurt.
- Tips:
- How to Infuse Milk:
- Step-by-Step:
- Heat the Milk: As you heat your milk in the Instant Pot, add your selected spices or flavor extracts.
- Simmer and Steep: Allow the milk to simmer gently with the add-ins for 5-10 minutes to let the flavors meld.
- Strain Out Solids: Once the infusion is complete and the milk has cooled to the appropriate temperature, strain out the spices before adding your starter culture.
- Benefits:
- This method provides a subtle background flavor that complements the natural tang of the yogurt.
- Step-by-Step:
Post-Fermentation Toppings for Your Instant Pot Yogurt
- Fruit and Sweeteners:
- Fresh Fruits: Diced berries, mango chunks, or banana slices can be stirred into or layered on top of your yogurt.
- Dried Fruits: Raisins, chopped dates, or apricots can be added for texture and natural sweetness.
- Natural Sweeteners: Drizzle honey, maple syrup, or agave nectar over your yogurt for added sweetness.
- Tips:
- Always add the fruit after the incubation process to prevent extra moisture from interfering with the fermentation.
- For a smooth blend, try pureeing fruits and stirring them into the finished yogurt.
- Nuts, Seeds, and Granola:
- Crunch Factor: Toasted almonds, walnuts, chia seeds, or a sprinkle of granola can add both flavor and texture.
- Serving Suggestion: Layer these add-ins on top of a serving bowl of yogurt for a breakfast parfait.
- Spices and Extracts:
- Flavor Enhancers: A dash of nutmeg, a few drops of rose water, or even a hint of lemon zest can elevate your yogurt’s flavor.
- Method: Mix these in just before serving so the flavors remain vibrant.
Experimenting with Fermented Flavors
- Culture Variations:
- Experiment with different starter cultures, such as using a probiotic capsule or a different brand of store-bought plain yogurt, to achieve subtle flavor variations.
- Pro Tip: Document your experiments (e.g., which add-ins, the quantity, and fermentation time) to refine your recipe over time.
- Layered Yogurt Creations:
- Create layered yogurt desserts by alternating flavored yogurt with fruit purees, nut butters, or granola.
- Presentation: This not only enhances flavor but also makes for a visually appealing dish.
Frequently Asked Questions
Q: How long does it take to make yogurt in the Instant Pot? A: The entire process takes about 10 hours, but most of this is hands-off time. The actual active preparation time is only about 30 minutes total.
Q: Is it worth making yogurt in an Instant Pot? A: Absolutely! You’ll save money (about $10 per batch compared to store-bought), have complete control over ingredients, and enjoy fresher taste. Plus, once you get the hang of it, it’s incredibly easy.
Q: Why do people boil milk in an Instant Pot for yogurt? A: Heating the milk to 180-200°F ensures food safety and helps create the perfect protein structure for thick, creamy yogurt.
Q: How do I sanitize an Instant Pot for yogurt? A: Either wash thoroughly with soap and water, or sterilize by pressure cooking 2 cups of water for 3 minutes with a natural release.
Final Thoughts
Making yogurt in your Instant Pot might seem daunting at first, but once you try it, you’ll wonder why you didn’t start sooner. The process is simple, economical, and rewarding. Plus, there’s something incredibly satisfying about creating your own yogurt from scratch.
Remember, like any new skill, your first batch might not be perfect – and that’s okay! Each time you make it, you’ll learn something new and get better results. Soon, you’ll be a yogurt-making pro, experimenting with different flavors and consistencies to create your perfect batch.
Why not give it a try this weekend? Your breakfast routine will never be the same!
Instant Pot Yogurt Recipe
Ingredients
- ½ gallon 8 cups milk (whole, 2%, 1%, or skim)
- 2 tablespoons plain yogurt with active cultures must contain Lactobacillus bulgaricus or Streptococcus thermophilus
Instructions
- Clean and sterilize your Instant Pot insert
- Pour milk into Instant Pot insert
- Close lid and press ‘Yogurt’ button, then ‘Adjust’ until display shows ‘BOIL’
- When boiling cycle completes, check temperature (should be 180-200°F)
- Remove insert and cool milk to 110-115°F (1-2 hours or 10-15 minutes in ice bath)
- Remove skin from top of milk
- Whisk yogurt starter with 1 cup of warm milk in separate bowl
- Pour mixture back into pot and whisk gently
- Return insert to Instant Pot
- Press ‘Yogurt’ button and set time (8-12 hours)
- Once complete, refrigerate for minimum 4 hours
- Whisk before serving
Notes
- For Greek-style yogurt, strain through cheesecloth for 2-6 hours after chilling
- Save 2 tablespoons of your homemade yogurt to use as a starter for next batch
- Higher-fat milk produces thicker yogurt
- If using skim milk, add 1 extra tablespoon of starter per quart
- Keep starter yogurt at room temperature for 30 minutes before using
- Do not disturb the pot during incubation
- Yogurt will thicken further upon chilling
- Store in an airtight container for up to 10 days
- Natural separation is normal; simply stir before serving